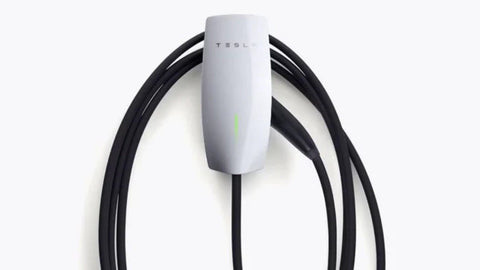
To make sure your Tesla charges effectively and swiftly at home, installing the Tesla Wall Connector Gen 3 is an excellent idea. The Wall Connector offers versatility and convenience and is made for high-speed charging. You will be guided through the whole installation process of the Tesla Wall Connector Gen 3 in this blog post, from setup to completion.
Items You'll Require
Prior to starting, collect the required equipment and supplies:
- Tesla Wall Connector Gen 3 (with cover plate, screws, and mounting bracket included)
- Circuit Breaker (dimensioned per Tesla's specifications)
- Electrical Wire (with the right gauge for your setup)
- Phillips head screwdriver
- Drill in order to mount the bracket.
- Level (in order of alignment)
- Wire strippers are used to prepare wires.
- Tape for electricity (insulation)
1. Organizing the Installation

Select a Site:
Proximity to Your Tesla: Choose a spot that is in close proximity to the Tesla parking area. The Wall Connector needs to be mounted so that it is accessible from the vehicle's charging port.
Accessibility: Make sure the site is conveniently accessible for installation as well as ongoing upkeep.
Power Source: Ensure that a suitable power source is in close proximity. A dedicated circuit with the right voltage and amperage is needed for installation.
Examine your area's electrical codes:
Compliance: Make sure the installation complies with all safety requirements by familiarizing yourself with the local electrical laws and regulations.
2. Attach the Wall Connector

Install the Bracket first:
Mark Drill Holes: To mark the drill holes on the wall, use the mounting bracket as a template. Before marking, make sure the bracket is level.
Drill Holes: Make holes where they are indicated. If required, install wall anchors based on the type of wall you have.
Attach Bracket: Using the included screws, fasten the mounting bracket to the wall. To make sure the bracket is straight, use a level.
Set Up the Electrical Attachments:
Cut-Off Power: At the circuit breaker panel, cut off the power to the circuit where the wall connector is to be put.
Strip Wires: In order to reveal the conductors, remove the insulation from the electrical wires.
Assemble the Cables:
- Take Off Cover Plate: Take off the cover plate to reveal the Wall Connector.
- Attach cables: Attach the electrical cables to the Wall Connector's terminals. Utilize the wiring guide that is color-coded and included with the wall connector.
- Attach the black wire to the hot, live terminal.
- White Wire: Attach to the terminal that is neutral.
- Attach the green wire to the ground terminal.
Tight and secure connections between all wires are necessary for safe wiring. If further insulation is required, use electrical tape.
Fit the Wall Connector in Place:
Install the Unit: Gently screw the Wall Connector into the bracket that has been installed. Make sure it is positioned correctly and fastened firmly.
Put the Cover Plate in Place:
Replace the cover plate and fasten it firmly using the included screws to provide a secure cover
3. Completing the Installation

Boost Energy:
Turn on Power: Return the circuit breaker panel's power.
Check Operation: Examine the indicator lights to make sure the Wall Connector is turning on.
After turning it on, the device ought to show standard LED indicators.
Check the Battery:
Link Up Your Tesla: To check the charging function, plug up your Tesla to the wall connector.
As soon as the connection is stable, the charging process should start.
Wall Connector Configuration:
Configure Settings: To adjust parameters like charging limitations and, if preferred, plan charging periods, use the Wall Connector's interface or the Tesla app.
4. Upkeep and Safety

Frequent Inspected:
Examine the Connections: To make sure the electrical connections and wall connectors are safe and secure, periodically inspect them.
Empty the Unit: Maintain the Wall Connector tidy and debris-free.
Expert Assistance:
Speak with an electrician: To make sure the installation is safe and complies with local codes, speak with a certified electrician if you have any questions or concerns about any aspect of it.
Simplify the Installation of Your Tesla Wall Connector
The Tesla Wall Connector installation is designed to offer a seamless and efficient setup for charging your Tesla vehicle at home. When installing your Tesla charger or Tesla wall charger, ensure you follow the installation manual carefully to guarantee optimal performance. Proper installation involves connecting the EV charger to a dedicated circuit with the appropriate voltage and amperage, aligning the charging cable securely, and configuring settings for maximum output. For the best results, keep your installation up-to-date by regularly checking the connections and functionality.

Utilize the Most Recent Tesla Technology to Install Home Chargers More Effectively
A successful home charger installation for your Tesla Model ensures a reliable charging experience. Begin by setting up the Tesla Wall Connector and ensuring it's connected to your Wi-Fi network to stay informed about firmware updates and other features. After installation, confirm the unit displays a solid green light, indicating it is ready for use. You can manage your mobile device to monitor charging status and adjust settings, ensuring your mobile charger is performing at its best and providing a hassle-free charging solution.

In Summary
The Tesla Wall Connector Gen 3 installation process entails a few crucial phases, including selecting the ideal position, connecting the electrical cable, and testing the device. You can make sure that the installation goes smoothly and take advantage of the convenience of quick, dependable home charging for your Tesla by following this step-by-step tutorial. Safety should always come first, follow local laws, and get professional help when necessary. After the Wall Connector is fitted, you will have everything you need to keep your Tesla charged and operational.
 :
:  :
: 


